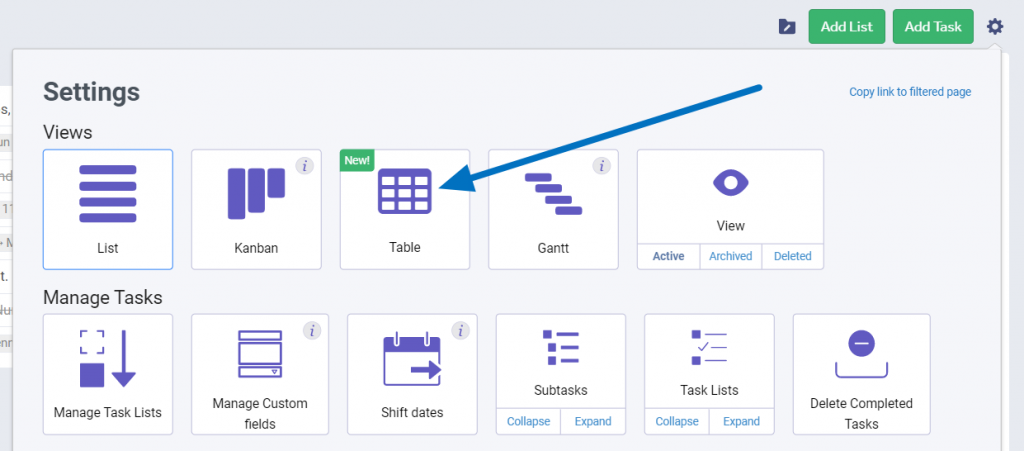
Introducing: Table View
Some of you may have seen a sneak peak of this on our Facebook group a few months ago. Well, it’s finally here! If you’re a Business or Enterprise user, you now have a new way to see your tasks: Table View.
Choose Your Columns
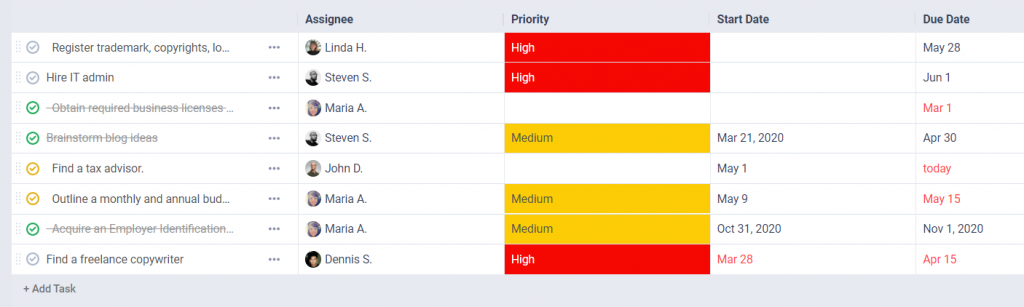
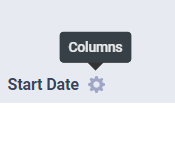
By default, you’ll see a column for Title, Assignee, Priority, Start Date, Due Date and Comments. But if you hover over any of the column titles and click the settings icon, you’ll get many more options.
You can add a column for: Files, Task List, Progress, Tags, Milestone, Last Comment, Date Created, Date Updated, Date Completed, Project, Project Group, Project Group – Project. The value in each column’s cells is editable by clicking it.
You can also resize by hovering over the column’s title, clicking the resize icon to its right, and adjusting the size.
Seamless Integration with Custom Fields for Tasks
Aside from the fields mentioned above, you are able to add a column for each field of the custom field templates applied to that project.
And not only you’re able to see the fields you selected as columns and their values as cells, you are also able to add and modify their values with a simple click. No need to open the task page or edit the task.
We will also show you fields from templates not applied to the current project(except templates that are inactive), and you’ll be able to easily link the template to the project when you click a cell in the new column.
But remember, a task can only have one template applied. So if you added columns for fields in 2 templates A and B, and want to set a value for a field in template A, template B will be unlinked from that task and the values lost(we will warn you before).
Sort Your Data
You decide how you want to look at your data. Instead of having to go to the Filters menu for custom sorting options, you can now do it directly from your columns for: Priority, Start Date, Due Date, Progress, Date Completed, Date Updated, Date Created.
Hover over their title and click the arrow to its right to select the order you want its data to be shown in.
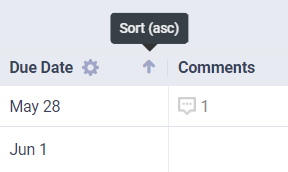
Table view is also integrated with our new custom grouping feature. So instead of task lists, you can group by another attribute like assignee or priority. Or you can choose to not group by anything and have one big spreadsheet.
Try It Out
Ready to give this a try? Go to your project’s tasks page, click the settings icon in the top right of the screen and select Table. If you have any feedback, let us know at help@freedcamp.com