📬 How to Connect a Form to Your Projects via Email-In
A customer recently asked us if you can get data from a form directly into Freedcamp. We did some testing and decided to share this guide with you. It can be used for a variety of cases, like getting requests or feedback from clients as issues or tasks, or getting info from other departments who don’t use Freedcamp as discussions or files.
Firstly, if you don’t know what our Email-In function is, let’s bring you up to speed. On our paid plans, each project has a unique email address like ax3cgy6+tasks@s.freedcamp.com or ax3cgy6+issues@s.freedcamp.com that you can send emails to and create tasks/issues/discussions/files straight from your mailbox. You can read more about it here.
Now let’s see how you can connect your project’s email-in address to two of the most popular form applications: Google Forms, Formstack and Typeform.
Google Forms
Step 1. Create a Google Form.
We used the example of someone getting tasks from another department and created a form with the following fields: Department, Email Address, Request Title, Request Description, Due Date.
Step 2. Install the Advanced Form Notifications add-on in Google Forms.
- While inside the form, click on the 3-dot icon in the top-right of the page
- Select Add-Ons
- Search “Advanced Form Notifications”
- Click it, select Install, and give it the required permissions
Step 3. Configure the add-on for the form.
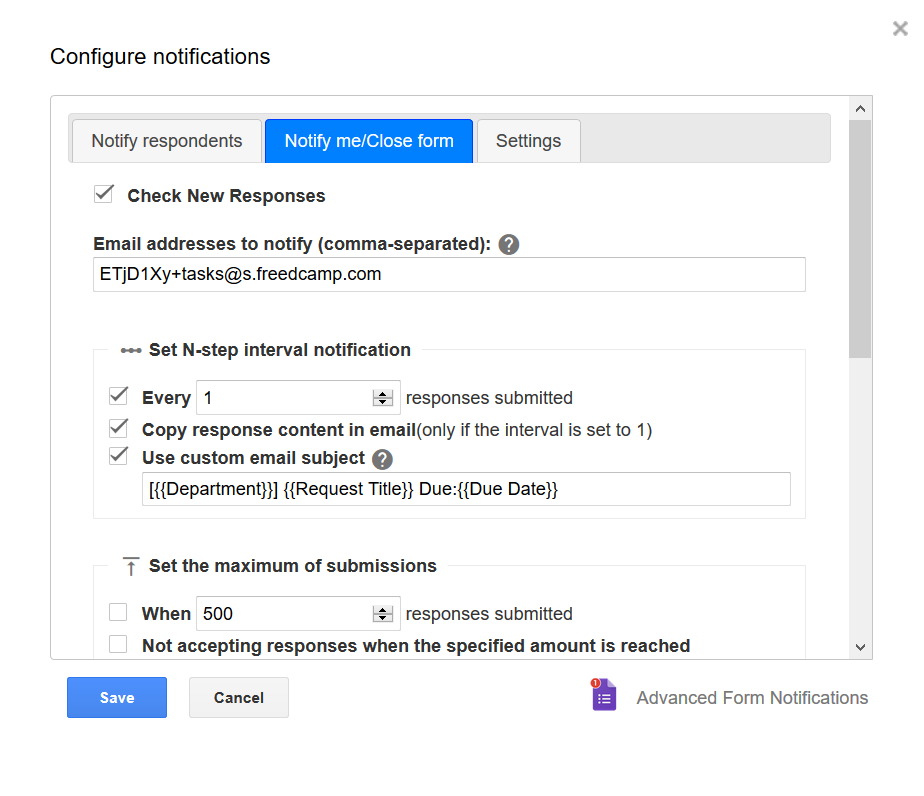
After the add-on is installed, we need to configure it to send form entries to our project’s email-in address. Use the settings below and put your project’s email-in address in the ‘Email addresses to notify’ field.
Here’s an example of a form entry, and the task it generated. Note that there’s no due date other than the title. This is because the email-in function does not support that at the moment. There’s also no assignee and task followers. If you want to add an assignee, simply add their email address to the email section in the Advanced Form Notifications settings, next to the email-in address.
Formstack
Formstack requires less set-up as there is no add-on needed, and gives similar results.
Step 1. Create a Form
We used the same example as before and created a form with the following fields: Department, Email Address, Request Title, Request Description, Due Date.
Step 2. Set the Notification Settings
- Go to the form’s Settings section
- Click on Emails & Actions option in the left-hand menu
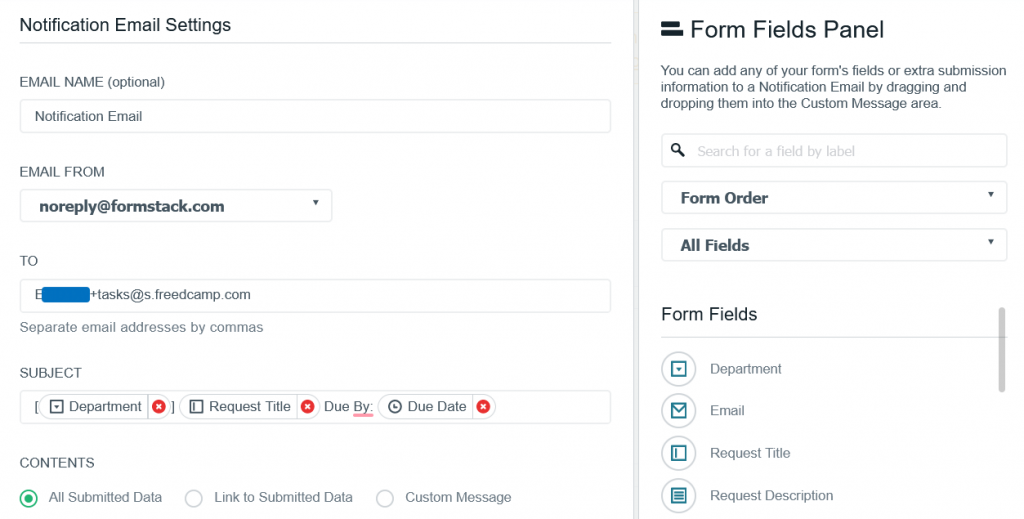
- Paste your project’s email-in address into the “To” field
- Go to the Form Fields panel on the right and drag to the Subject section data you want in the task’s title, like: Department, Request Title and Due Date.
Typeform
Step 1. Create a Form in Typeform
We used the fields from the previous examples.
Step 2. Set the Notification Settings
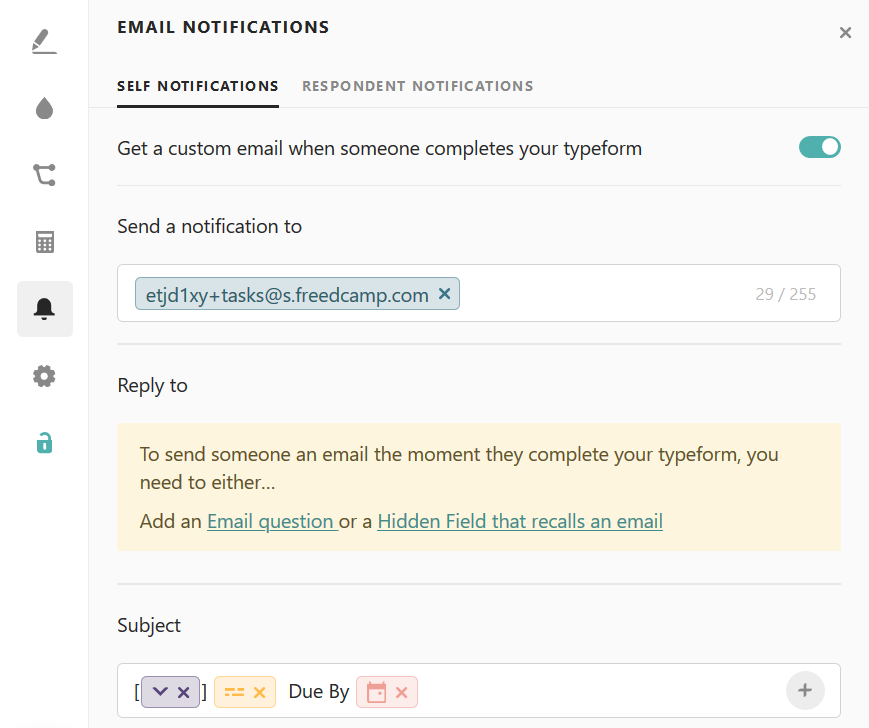
Click on the bell icon in the menu on the left, and add the following settings. We added our project’s email-in address and used the same format for the subject line. [(Department)] (Request Title) Due By: (Due Date). The resulting task should be identical to the one created through Google Forms and Typeform.
The icons in the subject section represent the type of field.
- The Department field, which is a dropdown type field.
- The Request Title field, which is a short text field.
- The Due Date field, which is a date field.